' Simply And Enjoy's : 25 Desember 2011

INTERLINKPPOB.NET PELUANG USAHA LOKET PPOB GRATIS SPANDUK PPOB & STRUK PPOB

Sabtu, 31 Desember 2011

Source Code Dan Script Visual Basic 6 Untuk Pemula

 Source code ini berisi kumpulan - kumpulan script yang biasa diterapkan.
Source code ini saya bagi dalam  37 kategori yang kesemuanya sudah saya kelompokkan, sehingga memudahlan untuk memilah script yang akan digunakan

37 Kategori ini meliputi :

KATEGORI 1 ACTIVEX DATA OBJECTS (ADO)
KATEGORI 2 DATABASE ADO CONTROL
KATEGORI 3 DATABASE DATA CODE
KATEGORI 4 DATABASE DATA CONTROL
KATEGORI 5 CETAK LAPORAN
KATEGORI 6 NOTEPAD SEDERHANA
KATEGORI 7 DATAGRID
KATEGORI 8 MEMBUAT SENDIRI FILE DLL & FILE OCX
KATEGORI 9 ARRAY
KATEGORI 10 CHECKBOX - OPTIONBUTTON
KATEGORI 11 COMBOBOX
KATEGORI 12 COMMAND BUTTON
KATEGORI 13 DATABASE
KATEGORI 14 DATE & TIME
KATEGORI 15 FILE & DIREKTORI
KATEGORI 16 FUNGSI BUATAN
KATEGORI 17 FORM
KATEGORI 18 INI File
KATEGORI 19 KEYBOARD
KATEGORI 20 KONVERSI
KATEGORI 21 LABEL
KATEGORI 22 LISTBOX
KATEGORI 23 LISTVIEW
KATEGORI 24 MASKEDBOX
KATEGORI 25 MATEMATIKA
KATEGORI 26 MOUSE
KATEGORI 27 PICTUREBOX
KATEGORI 28 PRINTER
KATEGORI 29 REGISTRY
KATEGORI 30 RICHTEXTBOX
KATEGORI 31 SCROLLBAR
KATEGORI 32 STATUSBAR
KATEGORI 33 STRING
KATEGORI 34 TEXTBOX
KATEGORI 35 TRANSFER DATA
KATEGORI 36 WINDOWS
KATEGORI 37 LAIN-LAIN

Download Software PPOB Interlink 2014

Selasa, 27 Desember 2011

Recycle Bin di Dalam Flashdisk

Apabila sebuah file terhapus dari Flashdisk maka file tersebut secara permanen akan terhapus. Berbeda dengan apabila kita menghapus file yang ada di Harddisk, maka filenya masih nyangkut terlebih dahulu di Recycle Bin. Oleh karena itu New Trik Tips Komputer akan memberikan sedikit trik bagaimana membuat Recycle Bin di Dalam Flashdisk. sekarang itu bukanlah hal yang mustahil membuat Recycle Bin di Dalam Flashdisk karena sekarang ini sudah ada software portable yang namannya adalah "iBin". 


thanks tombolesc.com
Download Software PPOB Interlink 2014

Minggu, 25 Desember 2011

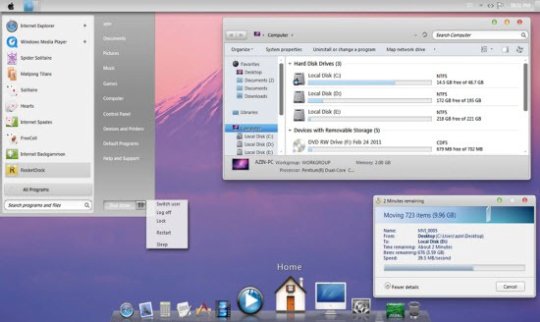
DOWNLOAD Theme Windows 7 Beauty 2011


Thanks inimu.com

NOTE : Windows on a computer backup system (can use System Restore existing applications      on Windows) before installing themes above., to be able to return to the default theme or     original state

Win 8 Skin Pack for Win 7

win-8-skin-pack-for-win-7
Download di sini.

Lion Skin Pack (Mac OS X Lion theme)

lion-skin-pack-4
Download di sini.

Snow Transformation Pack (Mac OS X Snow Leopard theme)

snow-transformation-pack
Download di sini.

Tiffany

tiffany
Download di sini.

MacOS 9x

macos-9x
Download di sini.
Download Software PPOB Interlink 2014

Capture screenshot dengan MAC OS X No software


Thanks proghita.com


Cara capture desktop Mac hanya perlu kelihaian tangan dan inilah triknya :

  1. Untuk capture seluruh desktop, tekan Command-Shift-3. Screen shot akan secara otomatis disimpan sebagai PNG file di desktop Mac Sobat.
  2. Untuk menyalin seluruh desktop, tekan Command-Control-Shift-3. Screen shot akan ditempatkan pada clipboard dan kemudian paste di tempat edit seperti adobe photoshop dan lainya.
  3. Untuk mengambil sebagian dari desktop, tekan Command-Shift-4. Sebuah kursor cross membentuk shoot akan muncul dan Sobat dapat klik kemudian men-drag untuk memilih area yang ingin Sobat ambil. Bila Sobat melepas tombol mouse, screen shot akan secara otomatis disimpan sebagai file PNG di desktop Sobat.
  4. Untuk capture window aplikasi tertentu, tekan Command-Shift-4, kemudian tekan Spacebar. Kursor akan berubah menjadi kamera, dan Sobat dapat bergerak di sekitar layar. Ketika Sobat memindahkan kursor di atas jendela aplikasi, jendela akan disorot. Seluruh jendela tidak perlu terlihat bagi Sobat untuk menangkap itu. Bila Sobat memiliki kursor di atas window Sobat ingin tangkap, cukup klik tombol mouse dan screen shot akan disimpan sebagai file PNG di desktop Anda.
  5. Tambahkan Control untuk dua pintas di atas untuk menempatkan screen shot pada clipboard, bila tidak  ingin menyimpannya ke desktop.
Screen shot 2 Cara Capture Screen Shot dengan Mac OS X Tanpa Software
Itulah sedikit trik capture images di Operating System Mac OS X dan tidak bisa di OS lain seperti Windows atau Linux.
Download Software PPOB Interlink 2014

[Opensuse 12.1] Remasterin Online For Suse Studio

Thanks patenpisan.com
meremaster opensuse 12.1, kenapa harus diremaster? jawabannya adalah karena saya membutuhkan opensuse yang setelah diinstall tidak perlu di oprek lebih lanjut, terus aplikasinya juga yang dibutuhkan sehari-hari sudah terinstall
1. Masuk ke http://susestudio.com/


Klik Sign in or create an account

Silahkan login sesuai yang anda suka, sini saya pake akun google

Klik Create new Appliances

Pilih templatenya, disini saya akan membuat remasteran opensuse dengan desktop KDE, jadi saya pilih KDE 4 desktop, gulung layar ke bawah

Beri nama appliancenya, setelah itu klik tab software diatas

Download Software PPOB Interlink 2014

Download Advanced Linux Programming


 DOWNLOAD NOW
TitleFileFilesizemd5 checksum
The Entire Advanced Linux Programming Book in One Filepdf1273361 5e722dc5dfcde263ea06fa193e9f61b4
Front Matter and Table of Contentspdf1273361 fe0c601b919879e93d79d25a78818b5c
Chapter 01 - Advanced Unix Programming with Linuxpdf2358355923f2a5d7fb4f941fe905fbe45be196
Chapter 02 - Writing Good GNU/Linux Softwarepdf280326 44c823c1240c7f70a6dc9dbfddbe03fa
Chapter 03 - Processespdf241758 87b5d98ba5b5933cf2ad1dbcf37641aa
Chapter 04 - Threadspdf292419 11f392b44c073498e9ec9b3f718e54e7
Chapter 05 - Interprocess Communicationpdf289853 0de9b56476a0e6e536fbac68e09b02d2
Chapter 06 - Mastering Linuxpdf268821ab8940fbcc40018d72bd2016e662afba
Chapter 07 - The /proc File Systempdf258582b3fe701f67a37ad7ba7233bcdc3f5d90
Chapter 08 - Linux System Callspdf 261352 583182dc09bc8b3c3773ba6d0fc710f2
Chapter 09 - Inline Assembly Codepdf 204992 c226e58fc7bf544df477d8ae96b680ed
Chapter 10 - Securitypdf 288441 fc340b97e9c7f3fc2f5fe4dd71132ffd
Chapter 11 - A Sample GNU/Linux Applicationpdf29821550a205644e441ae26d2041567d131b82
Appendix A - Other Development Toolspdf 272377 09a9a79a3c3abe6869df3f1ab5b39b14
Appendix B - Low Level I/Opdf 252755 3eaa0f0bbd103e1cc7872663e227a14b
Appendix C - Table of Signalspdf 177879 3b02a6abb38877580b743392b98c3290
Appendix D - Online Resourcespdf148074 372964ff1eb4f85aca3985736a06cc48
Appendix E - Open Publication License Version 1.0pdf176596 5b1ddb8d38b6a44b357345ba6c25010e
Appendix F - The GNU General Public Licensepdf228793 e207c51489e6f3cfafba5b13bb5e3bd9
Indexpdf1253094 004eefcfc2c6dca9a21233e748b81f35

Download Software PPOB Interlink 2014

Android 4.0 Development Tutorial


Write : Lars Vogel


1. What is Android?

1.1. Android Operation System

Android is an operating system based on Linux with a Java programming interface. It provides tools, e.g. a compiler, debugger and a device emulator as well as its own Java Virtual machine (Dalvik Virtual Machine - DVM).
Android is officially guided by the Open Handset Alliance but in reality Google leads the project.
Android supports 2-D and 3-D graphics using the OpenGL libraries and supports data storage in a SQLite database.
Every Android applications runs in its own process and under its own user id which is generated automatically by the Android system during deployment. Therefore the application is isolated from other running applications and a misbehaving application cannot easily harm other Android applications.

1.2. Important Android components

An Android application consists out of the following parts:
  • Activity - represents the presentation layer of an Android application, e.g. a screen which the user sees. An Android application can have several activities and it can be switched between them during runtime of the application.
  • Views - the User interface of an Activities is built with widget classes which inherit from android.view.View. The layout of the views is managed by android.view.ViewGroups. Views often have attributes which can be used to change their appearance and behavior.
  • Services - perform background tasks without providing an UI. They can notify the user via the notification framework in Android.
  • ContentProvider - provides data to applications, via a content provider your application can share data with other applications. Android contains a SQLite DB which can serve as data provider
  • Intents - are asynchronous messages which allow the application to request functionality from other services or activities. An application can call directly a service or activity (explicit intent) or ask the Android system for registered services and applications for an intent (implicit intents). For example the application could ask via an intent for a contact application. Applications register themselves to an intent via an IntentFilter. Intents are a powerful concept as they allow the creation of loosely coupled applications.
  • BroadcastReceiver - receives system messages and implicit intents, can be used to react to changed conditions in the system. An application can register as a BroadcastReceiver for certain events and can be started if such an event occurs.
  • Widgets - interactive components primary used on the Android homescreen to display certain data and to allow the user to have quick access the the information

Other Android components are Live Folders and Android Live Wallpapers. Live Folders display data on the homescreen without launching the corresponding application.

1.3. Dalvik Virtual Machine

Android uses a special virtual machine, e.g. the Dalvik Virtual Machine. Dalvik uses special bytecode. Therefore you cannot run standard Java bytecode on Android. Android provides a tool dx which allows to convert Java Class files into dex (Dalvik Executable) files. Android applications are packed into an .apk (Android Package) file by the program aapt (Android Asset Packaging Tool) To simplify development Google provides the Android Development Tools (ADT) for Eclipse. The ADT performs automatically the conversion from class to dex files and creates the apk during deployment.

1.4. Security and permissions

Android defines certain permissions for certain tasks. For example if the application wants to access the Internet it must define in its configuration file that it would like to use the related permission. During the installation of an Android application the user receives a screen in which he needs to confirm the required permissions of the application.

2. Android Application Architecture

2.1. AndroidManifest.xml

An Android application is described in the file AndroidManifest.xml. This file must declare all Activities, Services, BroadcastReceivers and ContentProvider of the application. It must also contain the required permissions for the application. For example if the application requires network access it must be specified here. AndroidManifest.xml can be thought as the deployment descriptor for an Android application.


The package attribute defines the base package for the following Java elements. It also must be unique as the Android Marketplace only allows application for a specific package once. Therefore a good habit is to use your reverse domain name as a package to avoid collisions with other developers.
android:versionName and android:versionCode specify the version of your application. versionName is what the user sees and can be any string. versionCode must be an integer and the Android Market uses this to determine if you provided a newer version to trigger the update on devices which have your application installed. You typically start with "1" and increase this value by one if you roll-out a new version of your application.
The tag defines an Activity, in this example pointing to the class "de.vogella.android.temperature.Convert". An intent filter is registered for this class which defines that this Activity is started once the application starts (action android:name="android.intent.action.MAIN" ). The category definition category android:name="android.intent.category.LAUNCHER" defines that this application is added to the application directory on the Android device. The @string/app_name value refer to resource files which contain the actual values. This makes it easy to provide different resources, e.g. strings, colors, icons, for different devices and makes it easy to translate applications.
The "uses-sdk" part of the "AndroidManifest.xml" defines the minimal SDK version your application is valid for. This will prevent your application being installed on devices with older SDK versions.

2.2. R.java, Resources and Assets

The directory gen in an Android project contains generated values. R.java is a generated class which contains references to resources of the res folder in the project. These resources are defined in the res directory and can be values, menus, layouts, icons or pictures or animations. For example a resource can be an image or an XML file which defines strings.
If you create a new resource, the corresponding reference is automatically created in R.java. The references are static int values, the Android system provides methods to access the corresponding resource. For example to access a String with the reference id R.string.yourString use the method getString(R.string.yourString));. R.java is automatically maintained by the Eclipse development environment, manual changes are not necessary.
While the directory res contains structured values which are known to the Android platform the directory assets can be used to store any kind of data. In Java you can access this data via the AssetsManager and the method getAssets().

Download Software PPOB Interlink 2014

Baca File Office 2007,2010 di Office 2003


Thanks jogsa.net 

Meskipun banyak sekali aplikasi pengolah data dan pengolah data yang bermunculan, microsoft office masih merupakan aplikasi yang paling banyak digunakan untuk keperluan tersebut. Ada banyak versi yang telah dirilis oleh microsoft ke publik, mulai dari versi lama dan versi terbaru seperti microsoft office 2010.
Trik Mudah Baca File Office 2007 dan 2010 di Microsoft Office 2003 Image
Setiap versi yang dirilis selalu dibuat dan menghasilkan file yang berbeda. Perbedaan tersebut diantaranya perubahan file ekstensi, core file dan beberapa yang lain. Perubahan ini juga tampaknya sedikit membingunkan karena kadang file yang dibuat di versi ini belum tentu bisa dibaca di versi yang lain.
Sebagai contoh, kita tidak akan bisa membaca file default yang dibuat di office 2007 dan 2010 di MS office 2003 atau office XP. Anda harus terlebih dahulu menyimpan ulang file agar kompatibel dengan office 2003 dan office XP. Masalahnya, bagi yang tidak mempunyai office 2007 atau 2010 tidak akan bisa melakukannya karena office 2003 tidak serta merta bisa membaca file tersebut.
Nampaknya microsoft tahu betul dengan hal ini dan karena itu microsoft menyediakan suatu aplikasi tambahan yang bisa digunakan agar file office 2010 dan 2007 bisa di baca menggunakan microsoft office 2003 dan microsoft office XP. Aplikasi yang diberi nama Microsoft Office Compatibility Pack for Word, Excel and Power Point File Format bisa anda dapatkan dengan gratis di website microsoft. Cara penggunaannya juga cukup sederhana dan tidak akan menyulitkan pengguna awam sekalipun.
Pertama, download microsoft compatibility di offiicial website microsoft. File tersebut berbentuk installer dengan kapasitas lebih kurang 37MB. Gunakan akses internet yang stabil agar proses download tidak mengalami kendala.
Trik Mudah Baca File Office 2007 dan 2010 di Microsoft Office 2003 Image

Download Software PPOB Interlink 2014

Mengganti Warna Rambut dengan Photoshop Written by Renra Cikatos


Kini tidak perlu lagi dilakukan pengecatan rambut pada model untuk mendapatkan sebuah foto dengan warna rambut yang diinginkan. Dengan adanya Photoshop, mengganti warna rambut dapat dilakukan dengan sangat mudah dan cepat. Sebenarnya banyak cara untuk melakukan perubahan ini. Tapi disini saya akan mencobanya dengan menggunakan efek dari Hue/Saturation. Untuk mencobanya, silahkan download dan buka foto di bawah ini ke dalam Photoshop.
Tutorial Photoshop Effect, Belajar, Edit, Efek, Foto, photo, Manipulasi, Tool, Teks, Pemula, Menengah, Filter, Download Brush Action Plugin

Setelah foto di atas Anda buka dalam Photoshop, buatlah seleksi di sekitar rambut dengan menggunakan Lasso Tool (L).
Tutorial Photoshop Effect, Belajar, Edit, Efek, Foto, photo, Manipulasi, Tool, Teks, Pemula, Menengah, Filter, Download Brush Action Plugin
Klik ikon Adjustment Layer dan pilih Hue/Saturation.
Tutorial Photoshop Effect, Belajar, Edit, Efek, Foto, photo, Manipulasi, Tool, Teks, Pemula, Menengah, Filter, Download Brush Action Plugin

Download Software PPOB Interlink 2014

Efek Foto Vintage


thanks Renra Cikatos
Begitu banyak cara mengubah foto agar menghasilkan nuansa foto klasik atau vintage. Namun di sini saya mempunyai cara sendiri yang saya anggap mudah untuk diikuti. Dan mungkin saja kalian tidak akan mendapatkan cara yang sama di situs tutorial Photoshop lainnya. Oke, untuk mencobanya silahkan save dan buka foto berikut ke dalam Photoshop.
Tutorial Photoshop, Adobe Photoshop Tutorials, Efek Photoshop, Photoshop Effect, Belajar Edit Foto, Free Download Brush Action Plugin.
Oh ya, jangan lupa siapkan juga teksturnya.
Tutorial Photoshop, Adobe Photoshop Tutorials, Efek Photoshop, Photoshop Effect, Belajar Edit Foto, Free Download Brush Action Plugin.
Langkah pertama, ubahlah Foreground Color menjadi warna biru (#006699) dan Background Color menjadi warna kuning (#ffff99).
Tutorial Photoshop, Adobe Photoshop Tutorials, Efek Photoshop, Photoshop Effect, Belajar Edit Foto, Free Download Brush Action Plugin.

Download Software PPOB Interlink 2014

Memindahkan Foto Antar Dokumen

Oleh Renra Cikatos thanks efekphotoshop.com


Buka foto pertama ke dalam Photoshop.
Tutorial Photoshop Effect, Belajar, Edit, Efek, Foto, photo, Manipulasi, Tool, Teks, Pemula, Menengah, Filter, Download Brush Action Plugin
Dan buka juga foto kedua ke dalam Photoshop.
Tutorial Photoshop Effect, Belajar, Edit, Efek, Foto, photo, Manipulasi, Tool, Teks, Pemula, Menengah, Filter, Download Brush Action Plugin
Klik Move Tool (V). Kemudian klik, tahan dan geser foto pertama ke foto kedua.
Tutorial Photoshop Effect, Belajar, Edit, Efek, Foto, photo, Manipulasi, Tool, Teks, Pemula, Menengah, Filter, Download Brush Action Plugin
Masih dengan menggunakan Move Tool (V), dan atur posisinya, mungkin seperti ini.
Tutorial Photoshop Effect, Belajar, Edit, Efek, Foto, photo, Manipulasi, Tool, Teks, Pemula, Menengah, Filter, Download Brush Action Plugin

Download Software PPOB Interlink 2014